How to Cook NY Strip in a Pan: 5 Easy Steps for Juicy Steak
You might have heard that cooking a perfect NY strip steak in a pan is tricky, but is that really true? With the right technique, you can achieve a restaurant-quality crust and juicy interior without a grill. Cooking NY strip steak in a pan is easier than you think.
It all comes down to a few key steps, from selecting the right cut to resting the steak properly. If you want to master this process and impress at your next meal, keep following along. This guide will show you how to cook NY strip steak in a pan in 5 easy steps.
Selecting and Preparing Your Steak
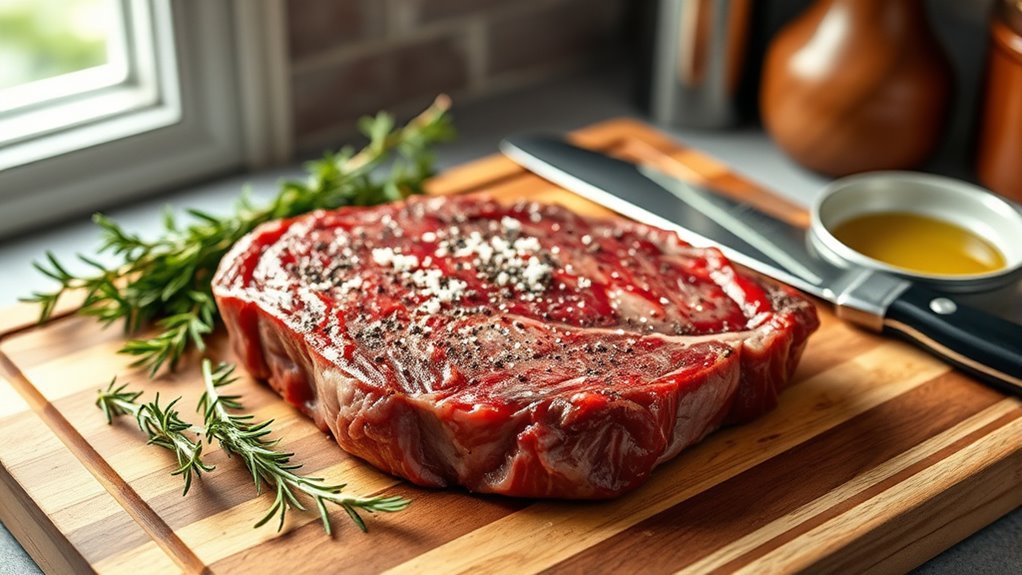
When selecting your NY strip steak, choose a boneless cut that’s at least 1 inch thick and well-marbled to guarantee flavor and juiciness.
High-quality steaks like USDA Choice or Prime offer the best tenderness and richness.
Before cooking, remove the NY strip from the refrigerator and let it reach room temperature for about 30 minutes. This step guarantees even searing and a better crust.
Pat dry the steak thoroughly with paper towels to eliminate moisture that could interfere with crust formation during searing.
Seasoning generously with kosher salt on all sides enhances the steak’s flavor, ideally done 30 minutes to 24 hours before cooking.
Proper thickness, marbling, and preparation set the foundation for a perfectly seared NY strip with a delicious crust.
Preheating and Seasoning the Pan
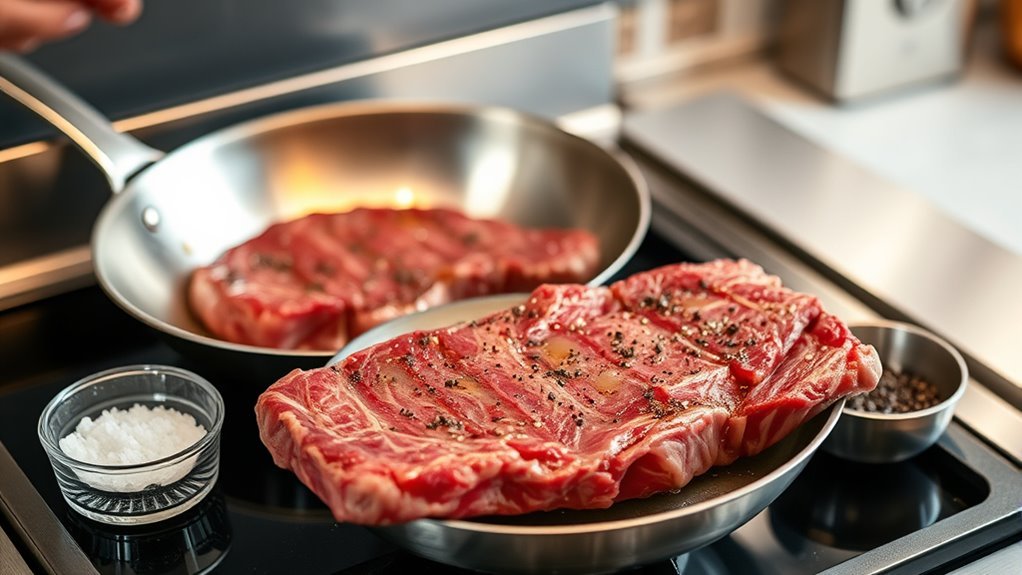
Although it might seem simple, properly preheating your pan is essential for achieving that perfect sear on your NY strip steak. Use a cast iron skillet and preheat it over high heat for about 10 minutes until it’s evenly heated and just starts to smoke.
This smoke signals the pan has reached the proper temperature for searing.
Before placing your steak, add a small amount of oil with a high smoke point, like avocado oil or ghee, to prevent sticking and assist in seasoning the pan.
Remember to:
- Preheat the pan until it produces a steady, thin smoke
- Use oil that withstands high heat without burning
- Ensure the pan is evenly heated for a consistent crust
This preparation sets the stage for an ideal crust on your steak.
Searing the Steak for a Perfect Crust
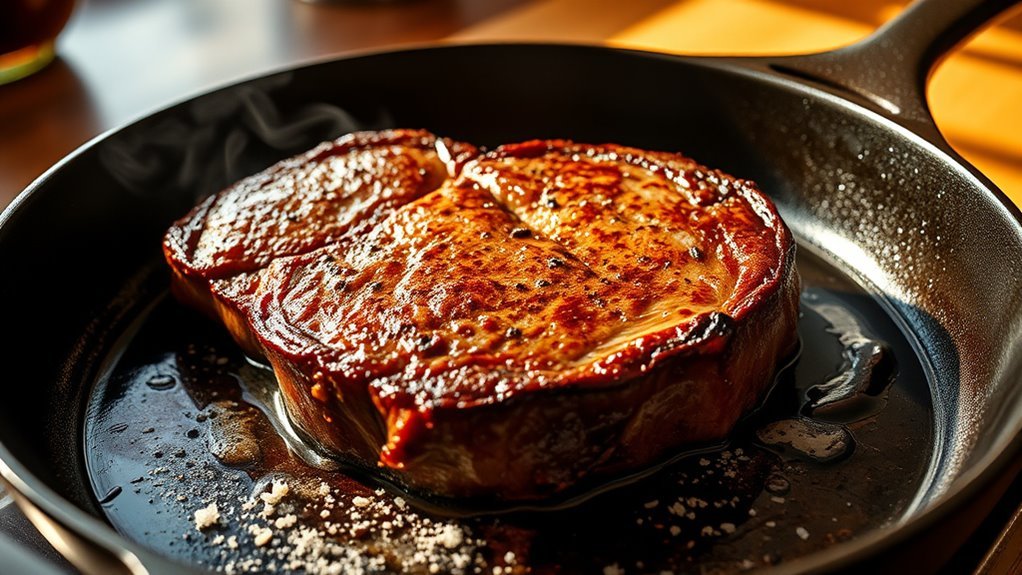
Since your pan is properly preheated, start by patting your NY strip steak dry to remove any excess moisture. This step is vital for achieving a crisp crust during searing.
Place the steak carefully into the hot skillet over high heat, laying it away from you to avoid splashes. Let it cook undisturbed for about 2-3 minutes until a deep golden-brown crust forms.
When the steak easily releases from the pan, use tongs to flip it and sear the other side similarly. Don’t forget to sear the edges and fat cap for an additional 30 seconds to 1 minute; this renders the fat and creates a uniform crust.
Mastering searing ensures your steak has that perfect crust every time.
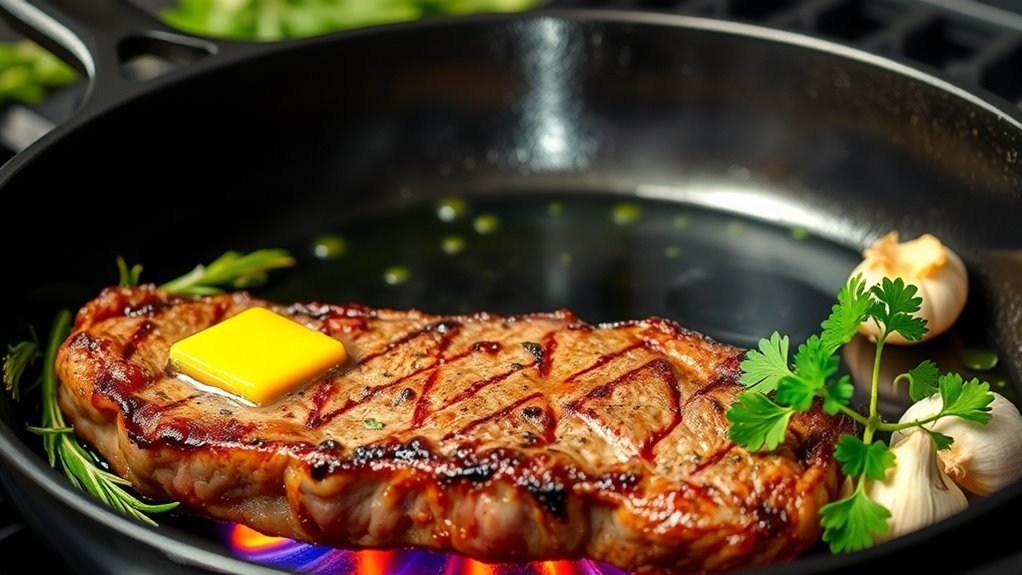
Adding Flavor With Butter and Herbs
As you near the end of cooking your NY strip steak, adding butter and fresh herbs transforms its flavor profoundly. Melt butter in the pan, then add garlic and herbs like rosemary or thyme to create an aromatic infused butter.
Use a spoon to baste the steak continuously with this melted butter mixture. This technique:
Use a spoon to continuously baste the steak with melted butter for enhanced flavor and moisture.
- Enhances rich flavor and deepens aromatic notes
- Develops a flavorful crust through even browning and caramelization
- Gives the steak a glossy finish and moist texture
Basting with herb-infused butter not only intensifies taste but also helps keep the steak juicy.
The final touch of a pat of butter just before removing it from the pan adds a creamy richness, rounding out the savory experience perfectly.
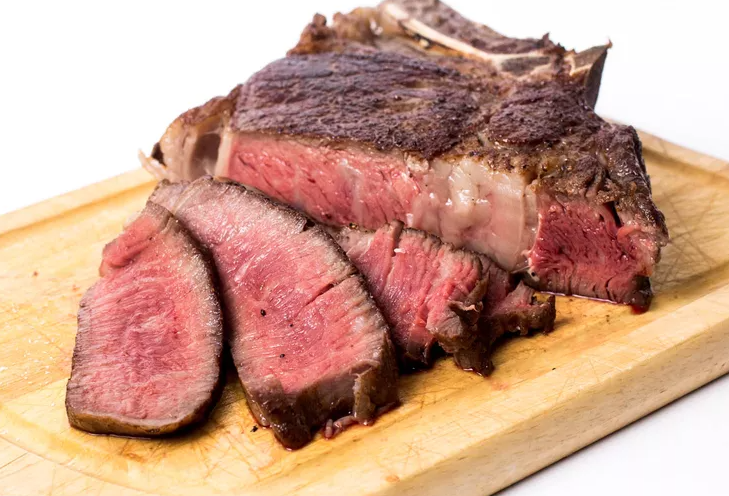
Resting and Serving Your Steak
Before slicing your NY strip steak, let it rest for at least 5 to 10 minutes on a cutting board so the juices can redistribute evenly throughout the meat. Resting steaks prevents the juices from spilling out when you cut, keeping the meat moist and tender.
To maintain warmth, loosely tent the steak with foil, avoiding excess moisture buildup. Use a meat thermometer to check that the internal temperature has stabilized before slicing.
When ready, thinly slice the steak against the grain to maximize tenderness. This final step ensures each bite is flavorful and juicy.
Once sliced, serve immediately to enjoy the steak at its best. Remember, letting your steak rest for 5 minutes is key for perfect juice redistribution and overall taste.
Frequently Asked Questions
How Do You Cook New York Strips in a Pan?
You sear your New York strip in a hot cast-iron skillet, seasoning it well, then baste with butter, garlic, and herbs.
Finish in a 400°F oven briefly, and let it rest before slicing and serving.
What’s the Secret to a Juicy NY Strip?
The secret to a juicy NY strip is searing it hot to lock in juices, basting with butter and herbs, then resting it for at least five minutes. This allows the flavors to redistribute and keeps every bite tender and flavorful.
How to Cook Steak in a Frying Pan?
You’ll want to heat your pan until it’s smoking hot, season your steak well, then sear it 2-4 minutes per side.
Add butter and herbs near the end, then let it rest before slicing.
What Is the 3 3 2 2 Rule for Steak?
The 3-3-2-2 rule means you sear your steak for 3 minutes per side, rest 3 minutes, then cook 2 minutes per side more.
It helps you get a perfect crust and ideal doneness every time.
Conclusion
Now that you’ve mastered these steps, cooking a NY strip in a pan will be as easy as flipping a switch. Like a painter adding the final brushstrokes, your careful sear, flavorful basting, and patient resting will create a steak that’s bursting with flavor and tenderness.
So go ahead—treat yourself to a restaurant-quality meal right at home. Savor every juicy, perfectly cooked bite of your NY strip steak cooked in a pan, and enjoy the satisfaction of a delicious homemade dinner.