7 Easy Steps to Cook Chicken Thighs on a Pan
If you want juicy, flavorful chicken thighs with a crisp exterior, cooking chicken thighs on a pan is a simple and effective method. Pan-frying chicken thighs allows you to achieve that perfect balance of tenderness and crunch. You’ll need to start by choosing the right cut and seasoning it properly, but that’s just the beginning.
Knowing exactly how to handle the heat and timing can make all the difference when cooking chicken thighs on a pan. Keep going, and you’ll uncover the key steps to mastering this straightforward technique for delicious results every time.
Choosing the Right Chicken Thighs
When choosing chicken thighs, start by picking boneless, skinless pieces for quicker cooking and easier prep. Look for boneless skinless chicken thighs with an even color, avoiding any signs of freezer burn or discoloration that can affect flavor.
You want thighs that feel firm and plump. This indicates freshness, juiciness, and good quality. If you’re buying pre-packaged chicken, always check the expiration date to ensure you select the freshest available.
Opt for thighs with a small amount of fat to enhance moistness and flavor during cooking. Paying attention to these details guarantees your chicken will cook evenly, stay juicy, and deliver the best taste in your pan-cooked dishes.
Preparing and Seasoning the Chicken
Before cooking, make sure to pat your chicken thighs dry with paper towels to remove excess moisture, which helps achieve a crispy exterior.
Pat chicken thighs dry before cooking to ensure a perfectly crispy skin.
When preparing chicken, even seasoning is key. Sprinkle about ¾ teaspoon of salt and ½ teaspoon of black pepper per pound, adding spices like paprika or cumin for extra flavor. To guarantee a uniform taste, apply the seasoning thoroughly on all sides of the chicken thighs.
For deeper flavor, you can marinate the seasoned chicken for at least 30 minutes or up to 24 hours in the fridge. This step not only enhances taste but also helps tenderize the meat.
Properly preparing and seasoning your chicken thighs sets the foundation for crispy skin and delicious results every time you cook.
Heating the Pan and Oil
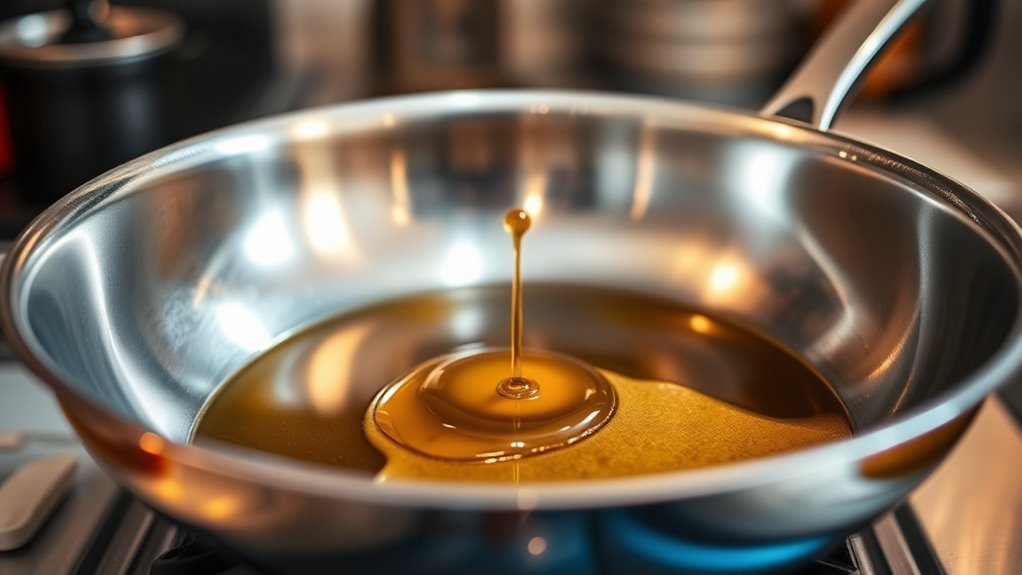
Start by preheating a heavy-bottom skillet over medium-high heat to guarantee even heat distribution.
Once the pan is hot, add 2-3 tablespoons of oil, such as olive or vegetable oil.
Allow the oil to heat until it reaches the right oil temperature; look for shimmering oil that signals it’s ready.
You can test this by flicking a tiny drop of water into the skillet; if the water sizzles immediately, the oil is hot enough.
Make certain the oil’s surface ripples lightly, indicating proper pan heating.
Using a preheated pan with hot oil prevents sticking and promotes a crispy finish.
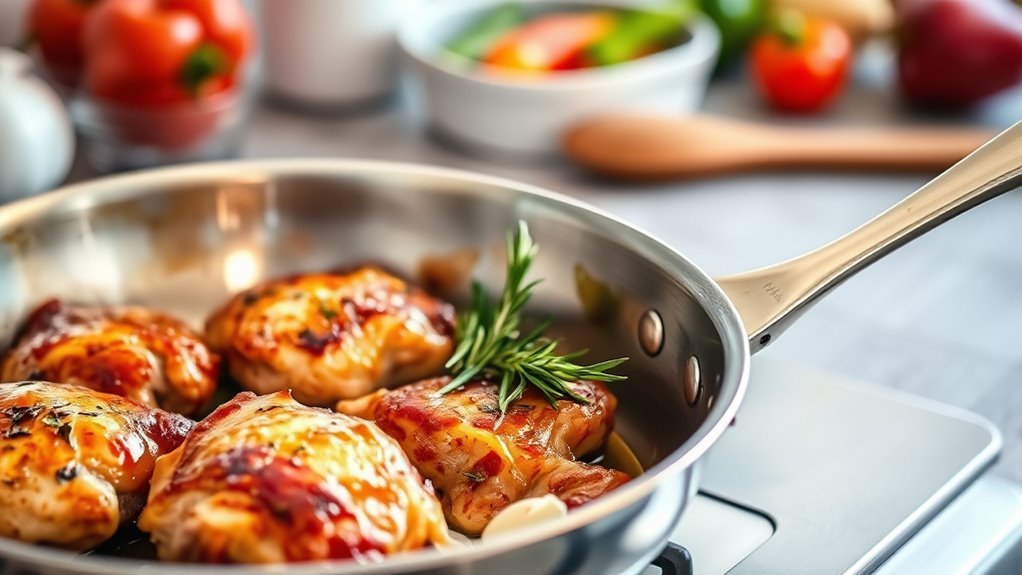
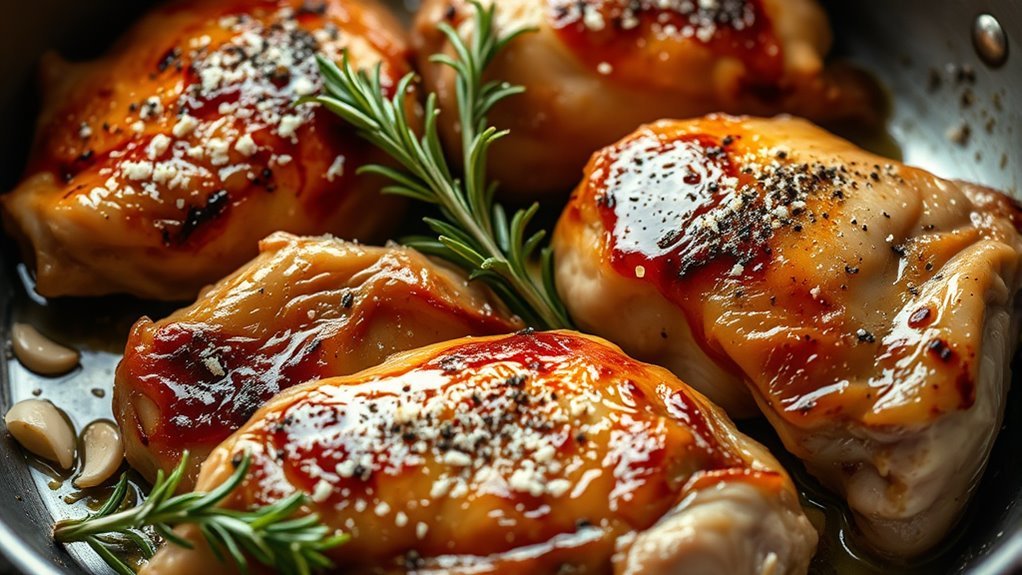
Cooking the Chicken Skin-Side Down
Once the oil shimmers in your hot skillet, carefully place the seasoned chicken thighs skin-side down, making sure the skin lays flat against the pan for maximum contact.
This step is vital for cooking thighs with a crispy skin and a beautifully pan-seared golden crust.
Here’s how to nail it:
- Cook without moving the chicken thighs for 5-7 minutes to let the skin crisp evenly.
- Adjust heat as needed to avoid burning while maintaining a steady sizzle.
- Use tongs to gently lift a corner; only flip when the skin easily releases and has a deep golden crust.
Patience here guarantees perfectly cooked chicken thighs with irresistibly crispy skin.
Flipping and Cooking the Other Side
After the skin-side has developed a golden crust and releases easily from the pan, it’s time to flip the chicken thighs. Use tongs or a spatula to gently lift and flip the pieces, preserving the crispy, seared crust. Avoid flipping too early or multiple times to maintain that perfect golden texture.
Cook the other side for about 5 minutes, allowing the heat to penetrate evenly.
| Step | Action | Tip |
|---|---|---|
| Wait | Let chicken release | Check if it lifts without sticking |
| Flip | Turn gently | Use tongs/spatula to avoid tears |
| Cook Other Side | 5 minutes | Achieve even cooking & searing |
This careful flip ensures the chicken cooks thoroughly while keeping the skin crispy and golden on both sides.
Checking for Doneness
How do you know when your chicken thighs are perfectly cooked? To check for doneness, it’s essential to ascertain you cook the chicken thoroughly and safely. Here are three reliable ways to check that the chicken is done:
- Use a meat thermometer to measure the internal temperature. It should reach 165°F (74°C) for safe consumption.
- Pierce the thickest part of the thigh and watch the juices run clear. No pink coloration means it’s done.
- Press the meat; it should feel firm but springy, not mushy or too soft. For bone-in thighs, verify the meat near the bone isn’t pink or translucent. Remember, after cooking, allow a short resting time. It helps the internal temperature stabilize and ensures perfect doneness.
Resting and Serving the Chicken
Knowing your chicken thighs are cooked through is just the start; letting them rest before serving makes all the difference. After removing them from the skillet, allow a resting time of at least 5 minutes.
Let your chicken thighs rest for at least 5 minutes after cooking to enhance juiciness and flavor.
This essential step lets the internal temperature stabilize and the residual heat finish cooking the meat, reaching the ideal 165-170°F. Resting prevents excessive moisture loss, keeping the chicken tender and juicy.
When you carve the thighs after resting, they’ll hold onto their juices better, making slicing easier and cleaner. Serve the chicken immediately after resting to enjoy the perfect balance of flavor and moistness.
Skipping this step risks dry meat and juice loss, so don’t rush. It’s the secret to tender, flavorful chicken every time.
Frequently Asked Questions
How to Cook Chicken Thighs on a Pan?
You heat oil in a pan, place seasoned chicken thighs skin-side down, and cook without moving for 5-6 minutes. Flip them, cook another 5-6 minutes, check for doneness, then let them rest before serving.
How to Cook Chicken Step by Step in a Pan?
Imagine crafting a masterpiece: you first prepare your canvas, dry and season the chicken. Then, you let it sizzle undisturbed, flip it gently, and finally rest it, revealing juicy perfection ready to savor.
How to Cook Chicken Thighs Step by Step?
Pat chicken thighs dry, season them, and heat oil in a pan. Cook skin-side down 5-6 minutes, flip, then cook 5-7 minutes.
Add garlic last minute, rest 5 minutes before serving.
How Long to Cook Chicken Thighs in a Saucepan?
You’ll cook chicken thighs in a saucepan for about 12 to 15 minutes over medium heat. Make sure to sear each side for 5-7 minutes and check they reach 165°F internally for safety.
Conclusion
Now that you know how to cook chicken thighs perfectly on a pan, you’re ready to enjoy juicy, flavorful meals anytime.
Did you know chicken thighs have about 25% more iron than chicken breasts? That means not only do they taste better to many, but they also provide extra nutrients.
With just a few simple steps, you can master this delicious protein and impress yourself and your guests every time you cook.
Give it a try and enjoy easy, pan-cooked chicken thighs that are tender, savory, and packed with flavor.