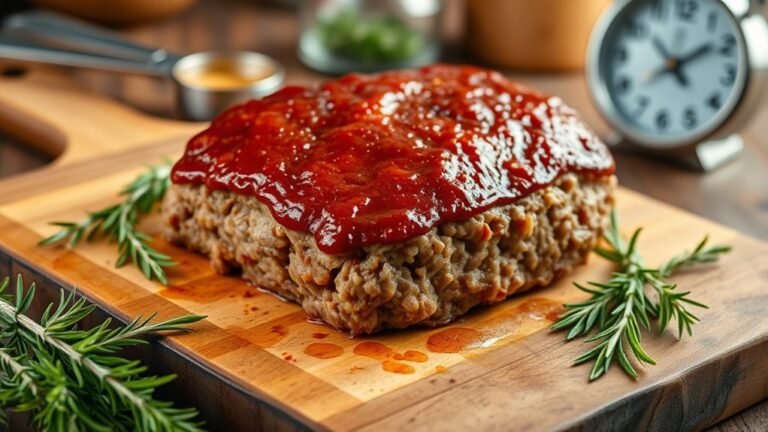

How Long to Pan Sear Chicken Thighs in 10 Essential Steps
Funny enough, you might just be planning to pan sear chicken thighs tonight without knowing how long they actually need to cook. Getting the timing right is essential to achieving that perfect crispy exterior and juicy interior. If you’ve ever wondered how long to pan sear chicken thighs and what steps make all the difference, you’re in the right place.
There’s more to it than just flipping once or twice—let’s explore what you need to know to get it just right. With the right technique, you’ll master the art of pan searing chicken thighs every time.
Selecting the Best Chicken Thighs for Pan Searing

When selecting chicken thighs for pan searing, you’ll want to pick boneless, skinless pieces for easier handling and faster cooking.
Focus on choosing chicken thighs that have a uniform size and thickness to ensure even cooking and consistent doneness throughout.
Choose chicken thighs with uniform size and thickness for even cooking and perfect doneness every time.
Fresh thighs work best since they sear more evenly and develop better browning compared to frozen ones.
Look for a slightly pink hue and firm texture, avoiding any that feel slimy or show discoloration.
While boneless, skinless thighs simplify pan searing, remember that proper selection is key to achieving juicy, well-cooked results.
Preparing Chicken Thighs for Optimal Crispiness

Selecting the right chicken thighs sets the stage, but how you prepare them before cooking makes all the difference in achieving that perfect crispy skin.
First, pat the chicken thighs dry thoroughly with paper towels to remove excess moisture. This step is vital for crispy skin.
Next, season the chicken evenly to enhance flavor and encourage browning.
When you pan sear chicken thighs, place them skin-side down in a hot, lightly oiled skillet. Don’t move them for 5-7 minutes; this lets the skin become golden brown and release easily from the pan.
After flipping, cook until the internal temperature hits at least 165°F. This guarantees your chicken isn’t only crispy on the outside but also perfectly cooked inside.
Choosing the Right Seasonings and Marinades

Although the right cooking technique is essential, choosing the right seasonings and marinades can elevate your chicken thighs from good to unforgettable.
Start with a balanced spice mixture: onion powder, cumin, coriander, paprika, and turmeric work great, using about 2 teaspoons per pound.
To achieve deep flavor infusion, marinate your chicken thighs for at least 30 minutes, or up to 24 hours, combining seasonings with a bit of oil and an acid like lemon juice.
Don’t forget to add garlic and fresh herbs to the mix for added richness.
If you’re short on time, rub the dry spice mixture evenly over the thighs before cooking to create a flavorful crust.
Adjust seasonings to suit your taste, but keep the natural chicken flavor prominent.
Heating the Pan and Selecting the Best Cooking Fat
Now that you’ve seasoned or marinated your chicken thighs, it’s time to focus on heating your pan properly and choosing the right cooking fat.
Preheat your skillet over medium-high heat for 2-3 minutes to ensure even cooking.
Select an oil with a high smoke point, such as avocado oil, ghee, or refined olive oil, to avoid burning during searing.
Pour enough oil to coat the pan’s bottom thinly, about 2-3 tablespoons.
Watch closely for the oil to shimmer and just start to smoke; this indicates it’s hot enough for searing.
Keep the heat steady to maintain a gentle sizzle without burning the fat or overcooking your chicken’s exterior.
Proper pan heating and fat choice set the stage for perfectly seared thighs.
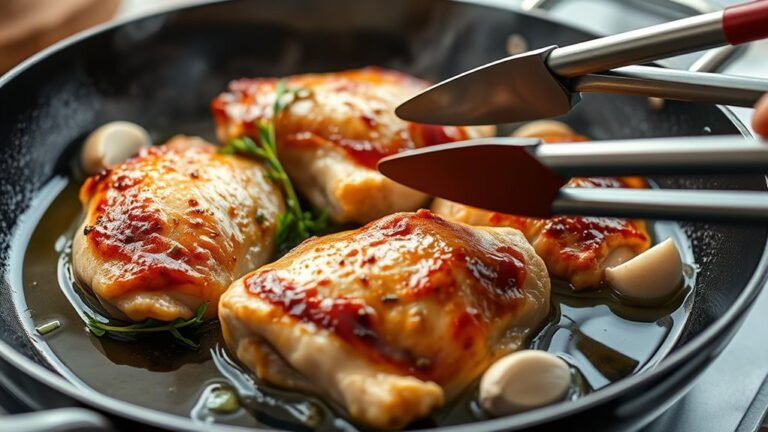
Initial Searing: How Long to Cook Skin-Side Down
Once your pan is properly heated and oiled, place the chicken thighs skin-side down and let them sear for about 5 to 7 minutes. Cooking skin-side down in a hot skillet is essential to develop that crispy skin you want.
Maintain high heat during this searing time to render the fat and achieve a rich golden brown color. Don’t flip too soon. Wait until the skin releases naturally from the pan, indicating it’s fully crisped.
Use tongs or a spatula to gently lift a corner and check if the skin is ready. Timing may vary slightly depending on thigh thickness and stove temperature, but this method ensures you’ll cook chicken with perfectly crisp, golden skin, setting the base for the rest of your cooking process.
Flipping the Chicken: Timing and Technique
When the chicken thigh naturally releases from the pan and shows a deep golden crust, it’s time to flip it carefully using tongs or a spatula. Timing is vital here—wait about 5-7 minutes on high heat before you check.
Wait 5-7 minutes on high heat until the chicken thigh releases easily with a deep golden crust before flipping.
Gently lift the edge to check the color; it should be a rich golden crust, signaling it’s ready to turn.
Flip the chicken only once during the sear to maintain even browning and protect that flavorful crust. After flipping, reduce the heat to medium and cook the second side for another 5-7 minutes, or until the internal temperature hits 165°F.
Proper timing and technique ensure a perfectly seared chicken thigh with a crispy exterior and juicy interior.
Adding Aromatics and Deglazing the Pan
After searing the chicken thighs, add sliced garlic or fresh herbs to the pan to infuse the oil with aromatic flavors. This step enhances flavor development by allowing the aromatics to sauté gently without burning.
Next, deglaze the pan with chicken broth, wine, or water while keeping it over medium heat. This loosens the caramelized bits stuck to the bottom, rich in taste, which you should scrape up with a wooden spoon.
These browned bits, or fond, are key to building a delicious sauce.
Simmer the deglazing liquid briefly to reduce and concentrate flavors. By incorporating aromatics and deglazing after pan sear, you elevate your chicken thighs with a rich, flavorful finish that balances perfectly with the tender meat.
Checking Doneness: Internal Temperature Guidelines
Although the perfect sear adds great flavor and color, you’ll want to rely on a meat thermometer to check the internal temperature of your chicken thighs to make certain they’re fully cooked and safe to eat. Proper doneness ensures both safety and tenderness.
To accurately check doneness, follow these timing tips:
- Insert the meat thermometer into the thickest part of the chicken thigh, avoiding the bone.
- Aim for an internal temperature of 165°F (74°C) for safe cooking, but 170-180°F (77-82°C) can enhance tenderness.
- Remove the chicken slightly before 165°F, since the temperature will rise a few degrees during resting.
Resting the Chicken After Cooking
Since resting chicken thighs allows the juices to redistribute throughout the meat, you’ll end up with juicier, more flavorful results.
After cooking, let the chicken rest for about 5 minutes. During this time, the internal temperature can rise by 2-5°F, so it’s smart to remove the thighs from heat just before they reach your target temperature.
Cover the chicken loosely with foil to retain heat while minimizing moisture loss. This resting period prevents the juices from spilling out when you cut into the meat, preserving moisture and enhancing texture.
Tips for Storing and Reheating Leftover Chicken Thighs
When you have leftover chicken thighs, storing them properly is key to keeping their flavor and texture intact. First, place the leftover chicken in an airtight container and store it in the refrigerator, consuming within 2-4 days for best taste.
Properly storing leftover chicken thighs in an airtight container keeps their flavor and texture fresh for 2-4 days.
If you want to keep it longer, freeze the chicken in freezer-safe bags or containers for up to a month. When you’re ready to reheat, avoid microwaving to keep the crispy skin from getting soggy. Instead:
- Warm the chicken gently in a skillet over low heat with a splash of broth to retain moisture.
- Flip skin-side down on medium heat to restore crispiness.
- Cook a few minutes until heated through and the skin is crispy again.
This method keeps your chicken delicious and fresh.
Frequently Asked Questions
How Long Does It Take to Pan Sear Chicken Thighs?
It takes about 5 to 7 minutes per side for boneless thighs and 7 to 10 minutes for bone-in thighs. Make sure the chicken releases naturally before flipping and check for an internal temperature of 165°F.
How Long Does It Take for Chicken Thighs to Cook?
Cooking chicken thighs takes about 10-25 minutes, like a dance between heat and time.
You’ll know it’s done when the internal temperature hits 165°F—juicy, safe, and ready to savor after a brief rest.
How Long Does It Take to Sear Chicken on the Stove?
You’ll want to sear chicken about 5 to 7 minutes per side on medium-high heat. Make sure the skin crisps nicely, and check that the internal temperature hits 165°F before serving.
How to Get the Best Sear on Chicken Thighs?
You get the best sear by patting chicken thighs dry, heating a skillet with oil until hot, then cooking skin-side down without moving for 5-7 minutes until golden and crisp.
Don’t rush flipping!
Conclusion
Now you know that pan searing chicken thighs to a perfect 165°F guarantees safety and juiciness. Did you know chicken thighs contain about 25% more fat than breasts, making them extra flavorful and forgiving if slightly overcooked?
By following these steps, you’ll get crispy, golden skin and tender meat every time. Remember to rest your chicken before serving to lock in those delicious juices—your taste buds will thank you!
Mastering how long to pan sear chicken thighs ensures you achieve the best texture and flavor. With these 10 essential steps, your chicken will be perfectly cooked, crispy, and irresistibly juicy.