

How Long to Bake a Cheesecake Step by Step (Complete Guide)
When you set out to bake a cheesecake, understanding how long to bake a cheesecake is crucial for achieving the perfect texture. Getting the timing just right can make all the difference between a creamy masterpiece and a cracked disappointment. You’ll want to understand how temperature and baking time work together to create that perfect texture.
But there’s more to it than just popping it in the oven—each step plays a vital role. Let’s explore what you need to know to bake your cheesecake flawlessly.
Understanding Cheesecake Baking Times
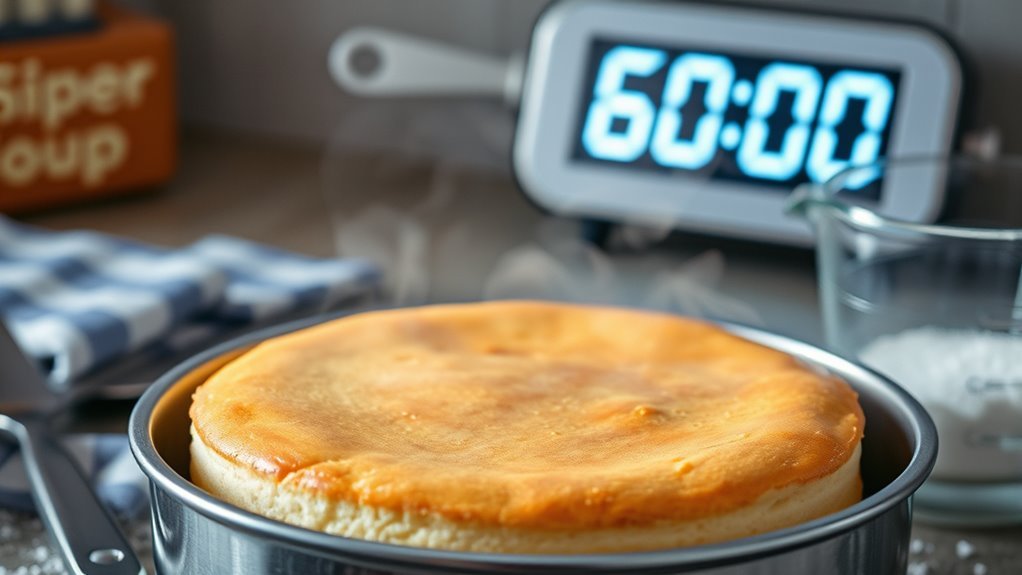
Although baking times can vary, you’ll generally bake a standard 9-inch cheesecake at 325°F or 350°F for about 55 to 70 minutes.
Bake a 9-inch cheesecake at 325°F or 350°F for 55 to 70 minutes for best results.
To achieve perfect cheesecake doneness, keep a close eye on the edges set and slightly puffed while the center jiggles gently when you gently shake the pan.
Using a water bath can help extend baking duration slightly and promote even cooking, which aids in cracks prevention.
Oven temperature plays a vital role, so oven monitoring is essential to avoid the overbaking risk that leads to dryness and cracks.
Smaller cheesecakes need less time, but the same principles apply.
Preparing Your Ingredients for Baking
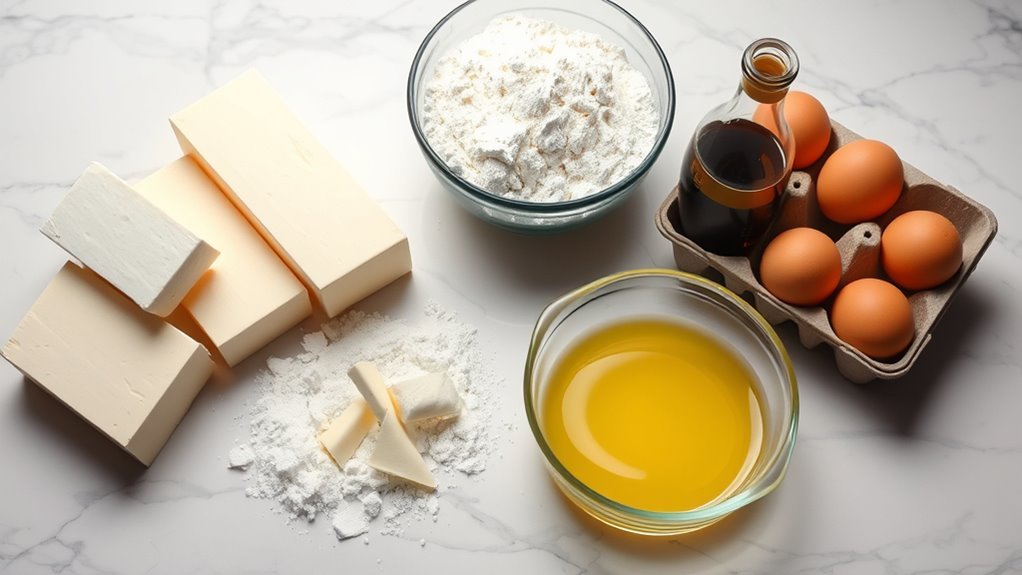
Knowing how long to bake your cheesecake is just one part of the process; preparing your ingredients properly establishes the foundation for a smooth, creamy texture.
Start by bringing cream cheese, eggs, and sour cream to room temperature to ensure smooth mixing without lumps.
When working with graham cracker crumbs, combine them with melted butter and sugar, then press firmly into your springform pan for an even crust.
Use proper measuring cups or a scale for accurate measurement. This is key for consistent results.
Fresh lemon zest or juice can add a bright flavor, but make sure you measure it precisely.
Preparing ingredients and tools ahead not only streamlines your process but also maintains ingredient quality, setting you up for cheesecake success.
Setting Up the Oven for Optimal Baking
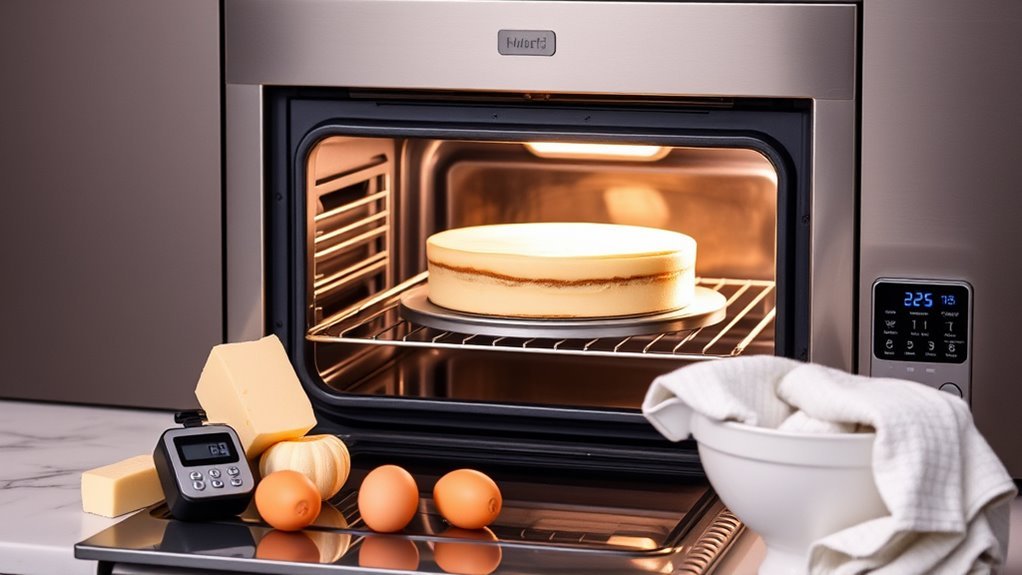
Before you place your cheesecake in the oven, make sure to preheat it to 325°F or 350°F at least 20 minutes in advance to guarantee even heat distribution. Wrap your springform pan with heavy-duty foil to prevent water seepage during the water bath setup.
Place a roasting pan filled with hot water on the oven rack below the cheesecake to create a humid environment for gentle baking. Position the cheesecake on the middle rack to ensure uniform heat exposure.
During the initial baking, avoid opening the oven door to maintain a consistent baking temperature and prevent cracks.
| Step | Purpose |
|---|---|
| Preheat oven | Ensures even heat distribution |
| Wrap with foil | Prevents water seepage |
| Water bath setup | Adds humidity for gentle bake |
| Middle oven rack | Promotes uniform heat |
| Avoid oven door | Maintains temperature stability |
Preparing the Crust Before Baking
When you prepare the crust, use 1.5 cups of graham cracker crumbs mixed with 1/4 cup of sugar and 5 tablespoons of melted butter. This graham cracker crust forms the base of your cheesecake, so mix these ingredients well to create an even crust mixture.
Next, press firmly into the bottom of a 9- or 10-inch springform pan, ensuring an even layer without gaps.
For proper crust preparation, pre-bake the crust at a baking temperature of 350°F (175°C) for about 10 minutes. This step helps set the crust and enhances its flavor.
After pre-baking, you can chill the crust in the freezer for 15 minutes to add sturdiness before pouring the filling.
These pre-baking steps guarantee a firm, delicious base for your cheesecake.
Mixing the Cheesecake Batter Correctly
Although it might seem simple, mixing the cheesecake batter correctly is essential for a smooth, creamy texture. Start with softened cream cheese in your mixing bowl to ensure a lump-free batter.
Properly mixing softened cream cheese is key to achieving a smooth, creamy cheesecake batter without lumps.
Then, follow these steps:
- Beat cream cheese and sugar until smooth and fluffy to create a light, airy base.
- Add eggs gradually, one at a time, to incorporate air evenly without overmixing.
- Mix on low speed after each addition to prevent excess air that could cause cracks.
- Frequently scrape down the sides of the bowl to combine all ingredients fully and maintain a consistent texture.
Wrapping and Placing the Pan in a Water Bath
Once you’ve mixed your batter to a smooth consistency, the next step is protecting your cheesecake from water during baking. To do this, wrap the outside of your springform pan tightly with two layers of heavy-duty foil, shiny side out.
This secure wrap prevents water seepage that can ruin your cheesecake’s texture. Next, place the wrapped pan on a baking sheet or rack for stability.
Fill a larger roasting pan with hot water, ensuring the water level rises halfway up the sides of your foil-covered pan. Gently set the pan into the water bath, double-checking that the foil is secure and the water level is correct. This method ensures even baking when you transfer the entire water bath setup carefully into the oven.
Baking Duration and Temperature Guidelines
Since baking times vary widely, you’ll want to adjust based on your cheesecake’s size and oven temperature. Follow these baking guidelines to get it just right:
- Preheat your oven to 325°F (160°C) for most 9-inch cheesecakes; baking time is usually 50-60 minutes.
- Mini cheesecakes require less baking duration, around 25-50 minutes at similar oven temperatures.
- Increasing oven temperature to 350°F (177°C) can shorten baking time but may increase the risk of cracks.
- To check doneness, look for set edges and use the jiggle test. The center should slightly jiggle as residual heat finishes cooking.
Remember to check for cracks before finishing. Proper oven preheating and monitoring baking time guarantee a creamy, crack-free cheesecake every time.
Checking for Doneness During Baking
Baking your cheesecake for the right amount of time is only part of the process; you’ll also need to know how to tell when it’s done. To check doneness, gently shake the pan. The edges should be set and slightly puffed, while the center has a slight jiggle or center wobble without looking liquid.
Use a toothpick inserted near the center. It should come out with moist crumbs, not wet batter. You can also check the internal temperature, which should be between 150°F and 155°F.
Avoid overbaking, as it causes cracks and dry texture. Removing the cheesecake when it’s just barely set ensures a creamy, smooth result.
Paying attention to these signs during baking time helps you achieve perfect doneness every time.
Cooling the Cheesecake Gradually
Although the cheesecake looks done when you take it out of the oven, you’ll want to cool it gradually to prevent cracks and sinking. Sudden temperature changes can cause surface cracks, so a slow cooling process is essential.
Cool cheesecake gradually after baking to avoid cracks and sinking caused by sudden temperature changes.
To cool the cheesecake properly:
- Leave it in the oven with the door slightly ajar for about 1 hour to allow steady cooling.
- Remove the cheesecake and cool it at room temperature for 1-2 hours to continue gradual cooling.
- Avoid refrigerating immediately; cool the cheesecake fully to maintain a smooth texture.
- Be patient and don’t rush the cooling process, as slow, steady cooling helps prevent cracks and sinking.
Following these steps ensures your cheesecake sets beautifully with no cracks and a velvety finish.
Refrigerating for the Perfect Texture
Once your cheesecake has cooled gradually and reached room temperature, it’s time to refrigerate it to develop that perfect, creamy texture. After baking, make sure to cool completely, ideally in the oven with the door slightly open, to prevent cracks.
Then, transfer it to a wire rack and let it sit at room temperature before chilling. You should refrigerate for at least 4 hours, but overnight refrigeration time is best to allow the cheesecake to set fully and achieve a firm texture.
Proper chilling not only enhances smoothness but also helps prevent surface cracking.
Avoid cutting into your cheesecake immediately after refrigeration; instead, let it rest at room temperature for 15-30 minutes to bring out the best flavor and texture.
Frequently Asked Questions
How Long Should You Bake a Cheesecake at 350 Degrees?
You should bake your cheesecake at 350°F for about 30 to 40 minutes. Start checking around 25 minutes, aiming for slightly set edges and a gently jiggling center to avoid overbaking or cracking.
How Long Should My Cheesecake Be in the Oven?
Think of your cheesecake as a delicate dance partner. You’ll want it in the oven for about 55 to 70 minutes at 350°F.
Watch for slightly puffed edges and a gently jiggling center before you take it out.
What Oven Setting for Cheesecake?
You should set your oven between 325°F and 350°F for baking cheesecake. Keep it steady to guarantee even cooking.
Using a water bath helps prevent cracks and keeps the texture smooth and creamy throughout.
How Can I Tell When Cheesecake Is Done Baking?
You’ll know your cheesecake’s done when the edges are set, and the center jiggles slightly but isn’t runny.
Give the pan a gentle shake; the center should wobble like jello, not liquid.
Conclusion
Baking a cheesecake is like nurturing a delicate flower—you can’t rush it without risking damage.
Remember, at 325°F or 350°F, your cheesecake needs about an hour to reach that perfect 150-155°F, with edges set and center gently jiggling.
Just like waiting for a bloom to open, patience during baking, gradual cooling, and proper chilling bring out the best texture and flavor.
Stick to these steps, and you’ll enjoy a cheesecake that’s truly worth the wait. For the best results, understanding how long to bake a cheesecake and following a step-by-step process is essential.